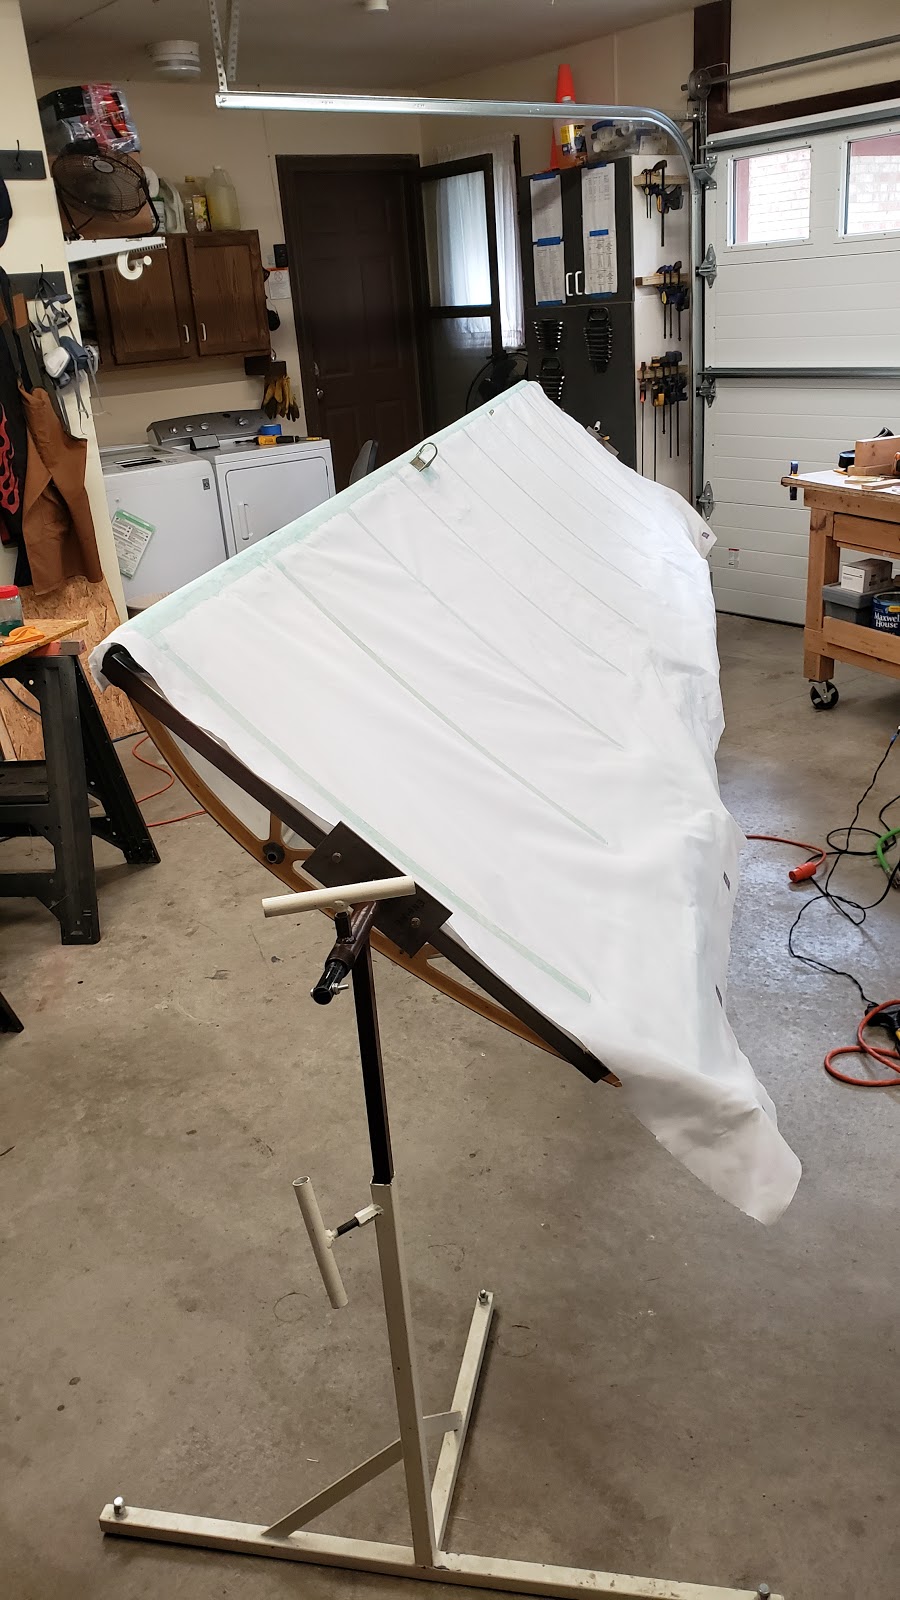
We've decided to add a baggage door to the aft baggage area. After much thought and experiments in accessing the most rearward baggage area, we came to the conclusion that getting to that area without a side access door would be most difficult. We did a search of the WINGSFORUM and FACEBOOK groups to get ideas on how others have implemented the door. There are so many different implementations and we decided to take the ideas we like and do our own thing.
We will be adding 3 aluminum tubes, two square tubes and one round. The square tubing will be used to form the outer side opening. The top longeron and side stringer will form the top and bottom side opening. The round tubing will form the bottom inner edge of the opening and along with two of the side stringer standoffs it will neatly close off the gap between the baggage area and the outer fabric skin.
The round tubing was cut and ground/filed to shape. The two square tubing pieces are extremely irregular and is taking quite a long time to get into shape. We had to restart the two pieces due to an issue getting them to nicely align with fabric. More works still need to be done getting them to the correct shape/length. Hours: 5

Monday, December 30, 2019
Friday, December 20, 2019
Left Door
We completed the frame for the left door by repeating the process we used for the right door. All parts were deburred, cleaned, and the joint areas were lightly scuffed. The parts were then epoxied and riveted together to form the outer door skeleton. Hours: 1.5
Monday, December 16, 2019
More Door work
We adjusted all the brackets on the left (pilot-side) door so that there would be an even gap around the door. Next, we disassembled the right door, and then deburred, scuffed, and cleaned the separate pieces (tubes and brackets). We applied epoxy at all the joints before installing the aluminum tubes back on the brackets. We installed one rivet (inside rivet) at each joint, but initially did just a partial pull on the rivets so that all pieces were still a bit loose. We placed the door back on the fuselage and taped it in place to make sure everything was lined up correctly, and then did the final pull on all the rivets. Excess epoxy was cleaned up and smoothed.
Moving back to the left (pilot) door, we disassembled it, then deburred and scuffed the ends, and cleaned the pieces. Still need to epoxy and rivet this other door.
So now we have the frame for the right (passenger) door completed, and are close to completing the frame of the left door. Hours: 5.0
Moving back to the left (pilot) door, we disassembled it, then deburred and scuffed the ends, and cleaned the pieces. Still need to epoxy and rivet this other door.
So now we have the frame for the right (passenger) door completed, and are close to completing the frame of the left door. Hours: 5.0
 |
| Right door riveted and epoxied together |
Sunday, December 8, 2019
Doors
We started work on the two doors for the plane. The doors have frames that are made from aluminum tubing which slides over steel corner brackets that were provided by the factory. The instruction manual did not provide good guidance on building the doors, but luckily there were some good tips already posted on the wingsforum that helped out. Pictures from several other builders also helped point the way.
To set the gap around the doors, we first taped spacers that were approx 3/16 inch in height to various spots around the fuselage door openings. We used pieces of tongue depressors as these spacers (a stack of 3, which was close to 3/16 inch). We taped the door corner pieces in place with painter's tape, and then measured the distances between the corner pieces to determine how long to make the aluminum frame pieces. We cut several 1/2" aluminum tubes to length, then deburred the ends. The door frames are made primarily from round tubes, except for one piece along the top that is made from square tubing (to accommodate the hinge).
We quickly found that the corner brackets for the door did not quite have the correct angles for a good fit on our fuselage. After consulting the web, we found that this was a common issue and that "tweaking" (i.e. bending) the corner brackets is needed to get the doors to fit nicely in the openings. We worked on the passenger door first, bending the brackets as needed so that the angles of the door fit perfectly within the frame. We had some difficulties with this at first, but then settled on a nice method where we first drilled a hole in a piece of dense wood (we used a piece of Ipe wood left over from a deck project), clamped the wood in a vise, inserted one end of the steel corner bracket into the wood block, inserted a long screwdriver into the other end of the bracket for leverage, and finally bent it slightly as needed. Several iterations of this process were used until each bracket was bent to the correct shape.
All the brackets for the right (passenger side) door were adjusted for a good fit, but we still have some work to do on the left side. Hours: 6.0
 |
| Michael gently bending one of the corner pieces. |
 |
| Spacers and alum door tubes held in place with blue tape |
Wednesday, December 4, 2019
Fuel System Redo and Land Gear Fabric Work Thoughts
Wow, now that the fuselage is back in the garage Ed and I have been giving a lot of thought on various things. First, we were never happy withe the flares on the fuel line runs so we decided to buy a new, highly recommended, fuel line flare tool. We removed all the old fuel line and started running the new fuel lines. But after some more thought, we are now planning on a more radical change in the fuel line routing and incorporating the Andair gascolator into the run. We are currently in the planning stages on the new runs.
We are also thinking about adding a baggage door to the side of the fuselage. Since the baggage area is so deep, having a side access door has been highly recommended by other Highlander/SuperSTOL builders. Like the new fuel routing we are currently in the planning stages on this.
And finally, we knew this was coming and the "kinda" planned a little, but we now need to give serious thought on how the fabric will be done in the area of the landing gear. Access holes though the fuselage will need to be made so the solid Grove landing gear can be rune through the fuselage. The mounting bracket for the gear is causing a lot of grief. We've how come to the conclusion that some additional non-structural parts will need to be added to support the fabric work. Then once the fabric work is done, some type of fairing will need to be constructed to cover up the holes. We are also concerned about cold air infiltration, so that is going to take some more thought to overcome.
So not a lot of physical work was done, but a lot of time has been put into this effort. Hours: 4
 |
| Some additional structure being considered |
 |
| Prototyping structure with fuel line and hot glue |
Friday, November 15, 2019
Air Regulator and Water Seperator
We've been hearing a faint hiss the past few days and it finally grew to a loud hiss. We noticed that air was coming from the bottom of the water separator where a drain cock was installed. Upon further investigation it was discovered that the how internals of the unit was corroded and was probably best if we replaced the unit. A quick order from Amazon and the new (and higher quality) unit arrived and was installed. Hours: 0 this wasn't airplane project related so no hours counted toward the project time!
 |
| Old corroded Harbor Freight Regulator / Air Separator |
 |
| New Ingersoll Rand Air Filter-Regulator |
Bottom Stringer Repair
After removing the bad portion of the bottom stringer, a new piece of 1/2" aluminum tubing was cut to the same length. A pipe bender was used to (intentionally) bend up one end where it enters the back of the fuselage to match the original profile. New 5/16" holes were drilled in the stringer for the supports tubes. Three new stringer support tubes were also made as three of the originals were also damaged (bent) in the incident.
To splice the new stringer to the old one, we used a small 4" section of 7/16" tubing as an inner sleeve (The piece on the left in the image above). The 7/16" tubing actually had slightly too large of diameter to fit inside, but it also had a fairly thick wall so it was filed and sanded down until it fit nicely inside of the 1/2 inch tubing. The two sections of stringer were connected together with the sleeve and Hysol epoxy.
The three new support tubes were drilled, deburred, and riveted to the fuselage, and the new stringer was then epoxied to the support tubes with Hysol epoxy. Looks good as new! Hours: 5.0
 |
| New section of stringer, 3 new support tubes, and inner sleeve |
The three new support tubes were drilled, deburred, and riveted to the fuselage, and the new stringer was then epoxied to the support tubes with Hysol epoxy. Looks good as new! Hours: 5.0
 |
| Bottom stringer repair completed |
Wednesday, November 13, 2019
Firewall Forward Worries
Michael has been learning Solidworks (THANKS EAA!) and has been getting the firewall pieces drawn up. Rotax was nice enough to provide 3D files for the engine and ring mount as well. The reason we are looking at this with such interest is that we found out recently that there will be an interference issue between the engine mount that Just Aircraft provided and the nose gear support weldment, also provided by Just Aircraft. In the attached images you can just barely see the interference near the bottom of the engine mount where the ring mount attaches. There is also one other location that will have to be modified as well. We are still waiting to hear back from Just Aircraft with any recommendations or fixes they might provide. In the Meantime, we'll continue to investigate all possible alternatives. Hours: 4
 |
| Solidworks Engine with Firewall, Engine Mount, Ring Mount, Nose Gear Support, and Rotax 912IS |
Sunday, November 10, 2019
Bottom stringer repair
As mentioned in the last post, the bottom stringer incurred some damage when we transported it back to the house. Here's an image that shows the bend in the aluminum tubing. Two small aluminum support tubes for the stringer were also bent as a result of the incident.
We considered replacing the entire stringer, but then figured it would be simpler to just cut off the rear section that was damaged and splice in a good piece. The stringer is epoxied to small vertical support tubes, which are riveted to the fuselage. We cut the back end of the stringer with a pipe-cutter, and then drilled out the rivets on the support tubes. This allowed us to remove the damaged section of stringer as well as the damaged support tubes. Hours: 1.5
 |
| Unnatural bend in stringer. That's not supposed to be there! |
We considered replacing the entire stringer, but then figured it would be simpler to just cut off the rear section that was damaged and splice in a good piece. The stringer is epoxied to small vertical support tubes, which are riveted to the fuselage. We cut the back end of the stringer with a pipe-cutter, and then drilled out the rivets on the support tubes. This allowed us to remove the damaged section of stringer as well as the damaged support tubes. Hours: 1.5
 |
| Damaged section of stringer removed |
Saturday, October 26, 2019
Transported Fuselage Back to Garage
Having completed the wing covering it was now time to move the fuselage back to the garage. We've been storing the fuselage in our hangar at Cox Airfield. We converted a utility trailer into an airplane transport trailer with a winch to pull the fuselage onto the trailer. A much more controlled way of getting the airplane on the trailer. The fuselage was securely strapped down and make the 5 mile trip to our home garage. We did have a small mishap on unloading the fuselage. We usually have a heavy counter-weight in the front of the fuselage to keep the nose wheel on the ground. But during the transport the weight was removed for safety reasons. During the un-strapping of the fuselage, we forgot about the counter-weight being removed and the tail dropped quickly and bent the bottom stringer. OOPS! Won't be difficult to repair, but will take some time. We moved the fuselage into the garage and cleaned up all the straps and put the trailer away. Hours: 2
 |
| Ed and Michael with the Fuselage unloaded |
 |
| Unloading the Fuselage |
 |
| Arriving at home base |
 |
| Fuselage ready to be unloaded |
Saturday, September 28, 2019
Wing Storage
After completing the fabric covering on the left wing, we hoisted it back up in the shed rafters so that it could keep the right wing company. Hours: 2.0
Thursday, September 12, 2019
Finishing up fabric work on the left wing
We used a soldering iron to burn holes through the fabric at various nut-plate locations, including those for the wing tips, pitot tube, and pulley covers. We also used razors and X-ACTO knives to carefully cut out the hole for the pitot tube, and slots for the aileron and flap cables.
Once completed, we noticed that there were a few additional bubbles that had formed on top of the plastic inspection rings. Not sure why this happened as there were no bubbles in the fabric after we first installed the rings. Perhaps we didn't apply enough glue to the top of the rings, although it's still not clear how those bubbles formed. In any case, we ironed out these bubbles, and will keep an eye on them to make sure they don't come back. Hours: 7
 |
| Michael ironing around an opening for the aileron pully |
 |
| Bottom of left wing with leading & trailing edge tapes installed |
 |
| Top of left wing with leading and trailing edge tapes installed |
Monday, September 2, 2019
Left Wing, Top Fabric and some Tapes
We made some good progress on the left wing fabric this past week. On the top side, we glued the fabric down to the tank and installed fabric rivets along the ribs on the top surface. We installed two doilies on the top that will help protect the area around the tank filler cap, and the exit slot for the aileron control cable.
We applied adhesive for the 2" wide chord-wise tapes on both the top and bottom surfaces, and then installed those tapes. We also installed two span-wise tapes on the top surface. We then did some finishing work with irons around the rivets, and also trimmed and glued the fabric at the ends of the wing. At each end of the wing, the fabric wraps around about 1/2 inch or so. Next up on the list of things to do will be to install the tapes along the leading and trailing edges of the wing. Hours: 8.5
We applied adhesive for the 2" wide chord-wise tapes on both the top and bottom surfaces, and then installed those tapes. We also installed two span-wise tapes on the top surface. We then did some finishing work with irons around the rivets, and also trimmed and glued the fabric at the ends of the wing. At each end of the wing, the fabric wraps around about 1/2 inch or so. Next up on the list of things to do will be to install the tapes along the leading and trailing edges of the wing. Hours: 8.5
 |
| Top surface chord-wise tapes installed |
 |
| Other side of wing, showing tank and filler cap area |
 |
| Bottom surface, tape at end of wing glued in place |
Friday, August 23, 2019
Left Wing, prep for more fabric
We did a little bit more work with the irons to remove some bubbles we discovered after gluing down the doilies to the left wing. Then we started adding new coats of adhesive, this time for installation of the top fabric piece. We applied a few coats of the glue to the leading edge, the fuel tank, the top surface of the ribs, and part of the trailing edge. Hours: 3.0
 |
| Adhesive (greenish color) brushed on for top fabric piece |
Sunday, August 18, 2019
Left Wing Fabric, bottom surface
We installed fabric rivets on the bottom of the left wing. These rivets are really just a backup to ensure that the fabric can never pull away from the wing. The rivet lines were covered with protective tape. Some finishing fabric tapes will eventually cover all these lines of rivets.
Next, we trimmed and glued the fabric at both ends of the wings. Then we performed the final fabric shrink on the bottom surface, shrinking the fabric at 300 and 350 degrees with irons.
Next, we decided to go ahead and install access port rings and doilies on the bottom surface. We measured and cut out the doilies from some pre-shrunk lightweight fabric, and also determined where we needed to install the plastic access rings. We applied glue, installed the access rings, and glued down all the doilies. Hours: 5.5
 |
| Left wing with rivets, access port rings, and doilies installed |
 |
| Closeup of doilies for an access port ring and the pitot tube |
Monday, August 12, 2019
Left Wing Covering Started
We laid the fabric over the wing, and started gluing the bottom sheet in place, starting from the trailing edge, then the ribs, then the leading edge. We had to carefully trim around the strut attach brackets. The fabric was shrunk at the lowest setting (250 degrees), and then we finished gluing the rest of the leading edge. A soldering iron was used to burn the holes for fabric rivets and nut plates. We will install the fabric rivets before shrinking the fabric at the higher settings. Hours: 6
 |
| Bottom fabric on left wing, with partial shrink |
 |
| Leading edge., before the scrap hanging down was trimmed off |
 |
| Fabric rivet holes and drain hole opened up with soldering iron |
 |
| Top view of wing shows how the fabric wraps around the leading edge |
Sunday, August 4, 2019
Right Wing Covering Completed
We finished covering the right wing this weekend after gluing down the last protective fabric tape, which was a wider 6" tape that will protect the leading edge of the right wing. This was a nice accomplishment, but now we get to do it all over again on the left wing.
The left wing was stored up in the shed rafters, so we hoisted that one down so we can start the fabric covering, and then hoisted the (now covered) right wing back up into the rafters for storage. Thunderstorms were building up as we were moving these wings around, but we got lucky and the rain didn't start pouring until we had everything safely stored away. Hours: 3.0
 |
| Fabric covering completed on the right wing |
The left wing was stored up in the shed rafters, so we hoisted that one down so we can start the fabric covering, and then hoisted the (now covered) right wing back up into the rafters for storage. Thunderstorms were building up as we were moving these wings around, but we got lucky and the rain didn't start pouring until we had everything safely stored away. Hours: 3.0
Thursday, August 1, 2019
Trailing Edge Tapes Done
We added the two trailing edge finishing tapes to the right wing. The top edge was done first followed be the bottom edge. On the bottom edge we had to cut small notches where the aileron and flap brackets were located. Once complete we used a soldering iron to burn the weap holes and screw attach holes. The holes around the aileron and flap pulleys were cut to their final size. Hours: 2
Tuesday, July 30, 2019
Trailing Edge Adhesive
We applied adhesive to the top rear edge of the wing for the finishing tapes to be applied later. Hours: 0.5
 |
| Bottom side of right wing |
Sunday, July 21, 2019
Right Wing Tapes
We installed all chord-wise protective tapes over the ribs on the top surface of the right wing, and also installed the tapes at both ends of the wing. At the wing ends, we wrapped the tapes around the edge a bit and glued them in place. We also installed two horizontal tapes on the top surface, and applied glue to part of the trailing edge for tapes that will be applied there.
As always, we worked through a few minor problems. A few tape wrinkles went unnoticed at first, but were discovered when we were about to apply a crossing tape. The wrinkles were fixed by spraying the area with acetone, peeling back the tape a bit to get the wrinkles out, applying more glue, putting the tape back down, and then smoothing it all out with an iron. Hours 6.0
As always, we worked through a few minor problems. A few tape wrinkles went unnoticed at first, but were discovered when we were about to apply a crossing tape. The wrinkles were fixed by spraying the area with acetone, peeling back the tape a bit to get the wrinkles out, applying more glue, putting the tape back down, and then smoothing it all out with an iron. Hours 6.0
Sunday, July 14, 2019
Wing Fabric Work
This weekend we got a lot of work done on wing fabric. We located and glued the plastic strengthening rings down to the bottom wing surface. a few of these will be opened immediately to help in the final constructions. And the remaining ones will only be cut open if needed after the airplane is flying. We also added fabric over the four wing strut attachment areas. Two main attachments and two for the jury struts.
Next we added the rib tapes on the top wing surface. Like the other tapes, this involved adding three coats of adhesive on the area, then applying the fabric and finally brushing a thinned mixture of adhesive on top and through the tape securing them in place.
Finally, we marked out the remaining areas on the wing that will need to have tapes added. Hours: 5
 |
| Ed applying adhesive to Inspection Ring |
 |
| Ed admiring our work on the bottom wing surface |
 |
| Fabric tapes on the top wing surface |
Monday, July 8, 2019
Fabric Work
Fabric reinforcement needed to be added to the top fabric plate where the aileron cable exits and around the fuel filler port. "Doilies" were cut from pre-shrunk fabric. Three coats of adhesive were added to the areas around the attach points. Once the adhesive dried, the fabric cutouts were added and attached with thinned adhesive.
The wing was flipped over and the same thing needs to be done for the bottom aileron and flap cable exits fabric plates. Also, around the strut attach brackets needed fabric reinforcement. The fabric was cut and the area needing adhesive was marked in pencil. Hours: 1.5
The wing was flipped over and the same thing needs to be done for the bottom aileron and flap cable exits fabric plates. Also, around the strut attach brackets needed fabric reinforcement. The fabric was cut and the area needing adhesive was marked in pencil. Hours: 1.5
 |
| Fabric "Doilies" on the bottom of the wing |
Sunday, June 30, 2019
Right wing, top fabric
It's finally starting to look like a real wing, as the top fabric sheet has now been installed on the right wing. For this process, we first glued it to the perimeter of the wing and used irons to remove wrinkles. We then shrank the large fabric surface at the lower setting (250 degrees), which helped pull it tight across the leading edge, tank, and ribs. We again used small irons to remove wrinkles around the tank and the leading edge. Next, we glued any remaining fabric contact areas that were not yet attached (portions of ribs, leading edge, and trailing edge). At the ends of the wing, we cut the fabric with pinking shears, leaving enough to wrap around the edge of the wing. Then we glued these edges down after applying 3 layers of glue to the edge.
After the edges were glued down, we cleaned out the fabric rivet holes with a drill, then applied some reinforcement tape across the holes, and used a rivet gun to install all the rivets along the ribs. Lastly, we finished shrinking the top fabric surface in two stages at 300 & 350 degrees. Hours: 5
After the edges were glued down, we cleaned out the fabric rivet holes with a drill, then applied some reinforcement tape across the holes, and used a rivet gun to install all the rivets along the ribs. Lastly, we finished shrinking the top fabric surface in two stages at 300 & 350 degrees. Hours: 5
 |
| Top fabric surface installed |
 |
| Fabric wrapping around end of wing |
Wednesday, June 26, 2019
Top wing Surface
After completing the bottom wing surface we marked where we wanted access plate rings to be installed. We'll install the rings once the top surface is done and we start working on fabric plates and tapes. We added three good coats of adhesive to the top of the wing on all the ribs, the top of the fuel tank and the aluminum leading edge. We cut fabric to a rough size of the wing surface and starting at the leading edge we applied adhesive around the perimeter of the wing. We had a few wrinkles to get out with a low 250F iron. Hours: 2.5
Sunday, June 16, 2019
Wing fabric
We finished installing the bottom fabric sheet on the right wing. We shrunk it at just 250 degrees first, then installed the fabric rivets on the ribs, and finally shrunk the fabric at the higher settings (300 and 350 degrees). We also trimmed and glued the fabric at both ends. Hours: 3
 |
| Fabric |
Monday, June 10, 2019
Rt wing fabric
We finished gluing the perimeter of the fabric to the bottom of the right wing. We ended up with quite a few bubbles and bulges along the glued edge, but we were able to resolve these with judicious use of the irons. Hours: 2
Sunday, June 9, 2019
Wings, Adhesive and Fabric
We started the task of attaching fabric to the bottom of the wings. First we had to determine what surfaces needed adhesive. We then applied three coats of glue to those surfaces. Boy did it take a lot longer to add the glue to these areas. We were used to "small" parts, but now that we've moved to the wings it surprised us how long it took to add the adhesive.
Once the adhesive was dry it was time to attach the fabric. In order to get a good straight line on the leading edge glue line, we snapped a chalk line on one edge of the fabric and then cut to that line. We started attaching the fabric to the leading edge, working from the middle outward. Once we were happy with that attachment, we added the thinned adhesive to the rest of the leading edge, wrapping around to the bottom surface of the wing. We used irons at 250F to get any bubbles/wrinkles out of the glued fabric. We had to cut holes for the strut attach bracket and jury struck bracket. We also had to do some custom cutting around the leading edge cuff. Finally we started working our way down the rib caps. Hours: 5
Once the adhesive was dry it was time to attach the fabric. In order to get a good straight line on the leading edge glue line, we snapped a chalk line on one edge of the fabric and then cut to that line. We started attaching the fabric to the leading edge, working from the middle outward. Once we were happy with that attachment, we added the thinned adhesive to the rest of the leading edge, wrapping around to the bottom surface of the wing. We used irons at 250F to get any bubbles/wrinkles out of the glued fabric. We had to cut holes for the strut attach bracket and jury struck bracket. We also had to do some custom cutting around the leading edge cuff. Finally we started working our way down the rib caps. Hours: 5
 |
| Added three coats of adhesive to the wing |
 |
| Fabric glued to the leading edge |
 |
| Fabric Glued to the bottom of the ribs |
Sunday, June 2, 2019
Wing Rotisserie
We finally started working on the Wing covering. We have the wings temporarily stored in our shed, mounted up in the rafters. We brought one of the wings into the garage and started making plans for mounting the wing in our rotisserie stands. We went to our local Home Depot Aviation Supply headquarters and bought some metal tubing to make the wing mounts. While Mike did the cutting of the tubes, Ed did the TIG welding. We used 1" square metal tubing. Once the welding was done we drill holes to match the rotisserie and mounted with AN3 bolts. We also bought foam pipe insulation and placed it on ends that go into the wing spars. We mounted the wings into the rotisserie so that we can begin the covering. The wings were wiped down with Acetone and Isopropyl Alcohol Hours: 5
 |
| One end of the Welded Rotisserie Wing Mount |
 |
| Wings mounted in Rotisserie |
 |
| Ed wiping the wings down with IPA |
Sunday, May 19, 2019
Aileron covering finished!
We completed the fabric work on both ailerons (finishing up with the leading edge tapes). Next up, we plan to start covering one of the wings. We did some clean up work in the garage in preparation. We will need to make a couple little jigs so that we can mount the wings on our rotisserie. This will allow us to rotate the wings to make it much easier to cover the wings. Hours: 5
 |
| Aileron covering completed! |
Monday, May 13, 2019
Aileron tapes
We continued fabric work on the ailerons by applying adhesive and then installing the short chord-wise tapes (on both sides). We also installed the trailing edge tape, and then used the irons to make sure everything was smooth and all bubbles were ironed out. Lastly, we cut some long strips of fabric with pinking shears which will used to cover the leading edges of the ailerons. We also drew a few pencil marks on the leading edge as a location guide for applying the glue. Hours: 4
 |
| Aileron with chord-wise tapes and trailing edge tape installed |
Sunday, May 5, 2019
Aileron Fabric Covering
Work continues on the covering of the two ailerons. We installed fabric rivets on both the top and bottom surfaces. But before installing the rivets, with put reinforcing tape on the aileron rib caps and then burned the holes with a hot soldering iron. Once the holes were cleared with installed the rivets.
As we did on the flaps we installed the reinforcing fabric "dollies" on the fabric plates. There were a total of three on the bottom surface and one on the top top surface. The same procedure was used on the aileron as was used on the flaps.
Finally, we added three coats of adhesive on the top and bottom surfaces where we plan to install fabric tapes over the the ribs/rivets. Hours: 4
Sunday, April 28, 2019
Aileron fabric covering
Continued work on covering the ailerons with fabric. Applied adhesive and then attached fabric to cover the top and bottom sides of the ailerons, then shrunk the fabric with irons as usual. Also, similar to the flaps, we used extra material at the ends of the ailerons to cover the ends of the ailerons. We also cut out some doily shapes using lightweight pre-shrunk fabric which will provide extra protection around the hinges and control horn. Hours: 5
 |
| Fabric glued and shrunk on one of the ailerons |
 |
| Michael cutting out some protective doilies |
Thursday, April 11, 2019
Prep for aileron covering
We are prepping the ailerons for covering. We learned a few things from covering the flaps, and are taking advantage of that knowledge. We drilled a few new holes for fabric rivets because we knew (based on experience with the flaps), that a few of the holes were going to cause rivets on opposite sides to interfere with each other. We smoothed the edges around the new holes, and applied a little extra varnish to seal the wood in those spots.
While doing this work, we discovered something interesting. There was a tiny little flying creature embedded in the cured fiberglass on one of the ailerons. Looks like a small wasp. He will forever be a part of our flying machine. Hours: 1.0
While doing this work, we discovered something interesting. There was a tiny little flying creature embedded in the cured fiberglass on one of the ailerons. Looks like a small wasp. He will forever be a part of our flying machine. Hours: 1.0
 |
| Wasp embedded in fiberglass |
Monday, April 8, 2019
Complete Flap Fabric
The leading edge tapes on the flaps were shrunk to give a nice tight fit. Then a coat of the thinned adhesive was put on the tape to securely attach it to the flap. The ends were dressed around the curved surfaces, cutting a few slits to keep it from bunching. Irons were used to smooth any bubbles and/or wrinkles.
 |
| Completed Flaps on Display |
Having completed the flaps, it was a good time to clean the work space. Ed workbench also need to be lengthened and now was a good time to complete this task.
The Just Highlander manual gives some advice on how to maximize fabric usage to minimize waste. We took measurements of the ailerons and wings and cut the fabric for the aileron to adhere to this advice. Hours: 5
Subscribe to:
Posts (Atom)