Thursday, April 27, 2023

Tank cleanout, Windscreen work, Stripe, Fuel cap

To clean out the fiberglass fuel tanks and also ensure there is no uncured resin, we used the clean-out method recommended by the factory.  Basically,  add 1 gallon of lacquer thinner to the tank (ensuring all openings are sealed), swish around in the wing while turning and tilting it to ensure all surfaces of the tank get wet (about 30-40 seconds), then remove cap to release pressure as it builds quickly.  Drain and repeat with 2nd gallon.  Drained fluid should be clearer.  Drain and repeat with 3rd gallon.  This 3rd gallon comes out clear, so it is saved for use on the 2nd wing.  This process was then repeated on the 2nd wing.  A total of 5 gallons of lacquer thinner was required using this method. 

Michael sealing fuel port in prep for fuel tank cleanout

During a final test fit of the windshield, we found that some of the attachment screws could catch the sides of the holes in the windscreen.  Since this could lead to eventual cracking of the windshield, we carefully enlargened the holes for better clearance by using a Dremel tool with a cylindrical bit.

A few holes in plastic windscreen enlargened

A green stripe (3M light green material) was applied to the side of the fuselage between the white and orange paint.  We like the look and plan on adding this stripe material to the wings, cowl, and control surfaces that have both orange and white.

Green stripe added to sides of fuselage

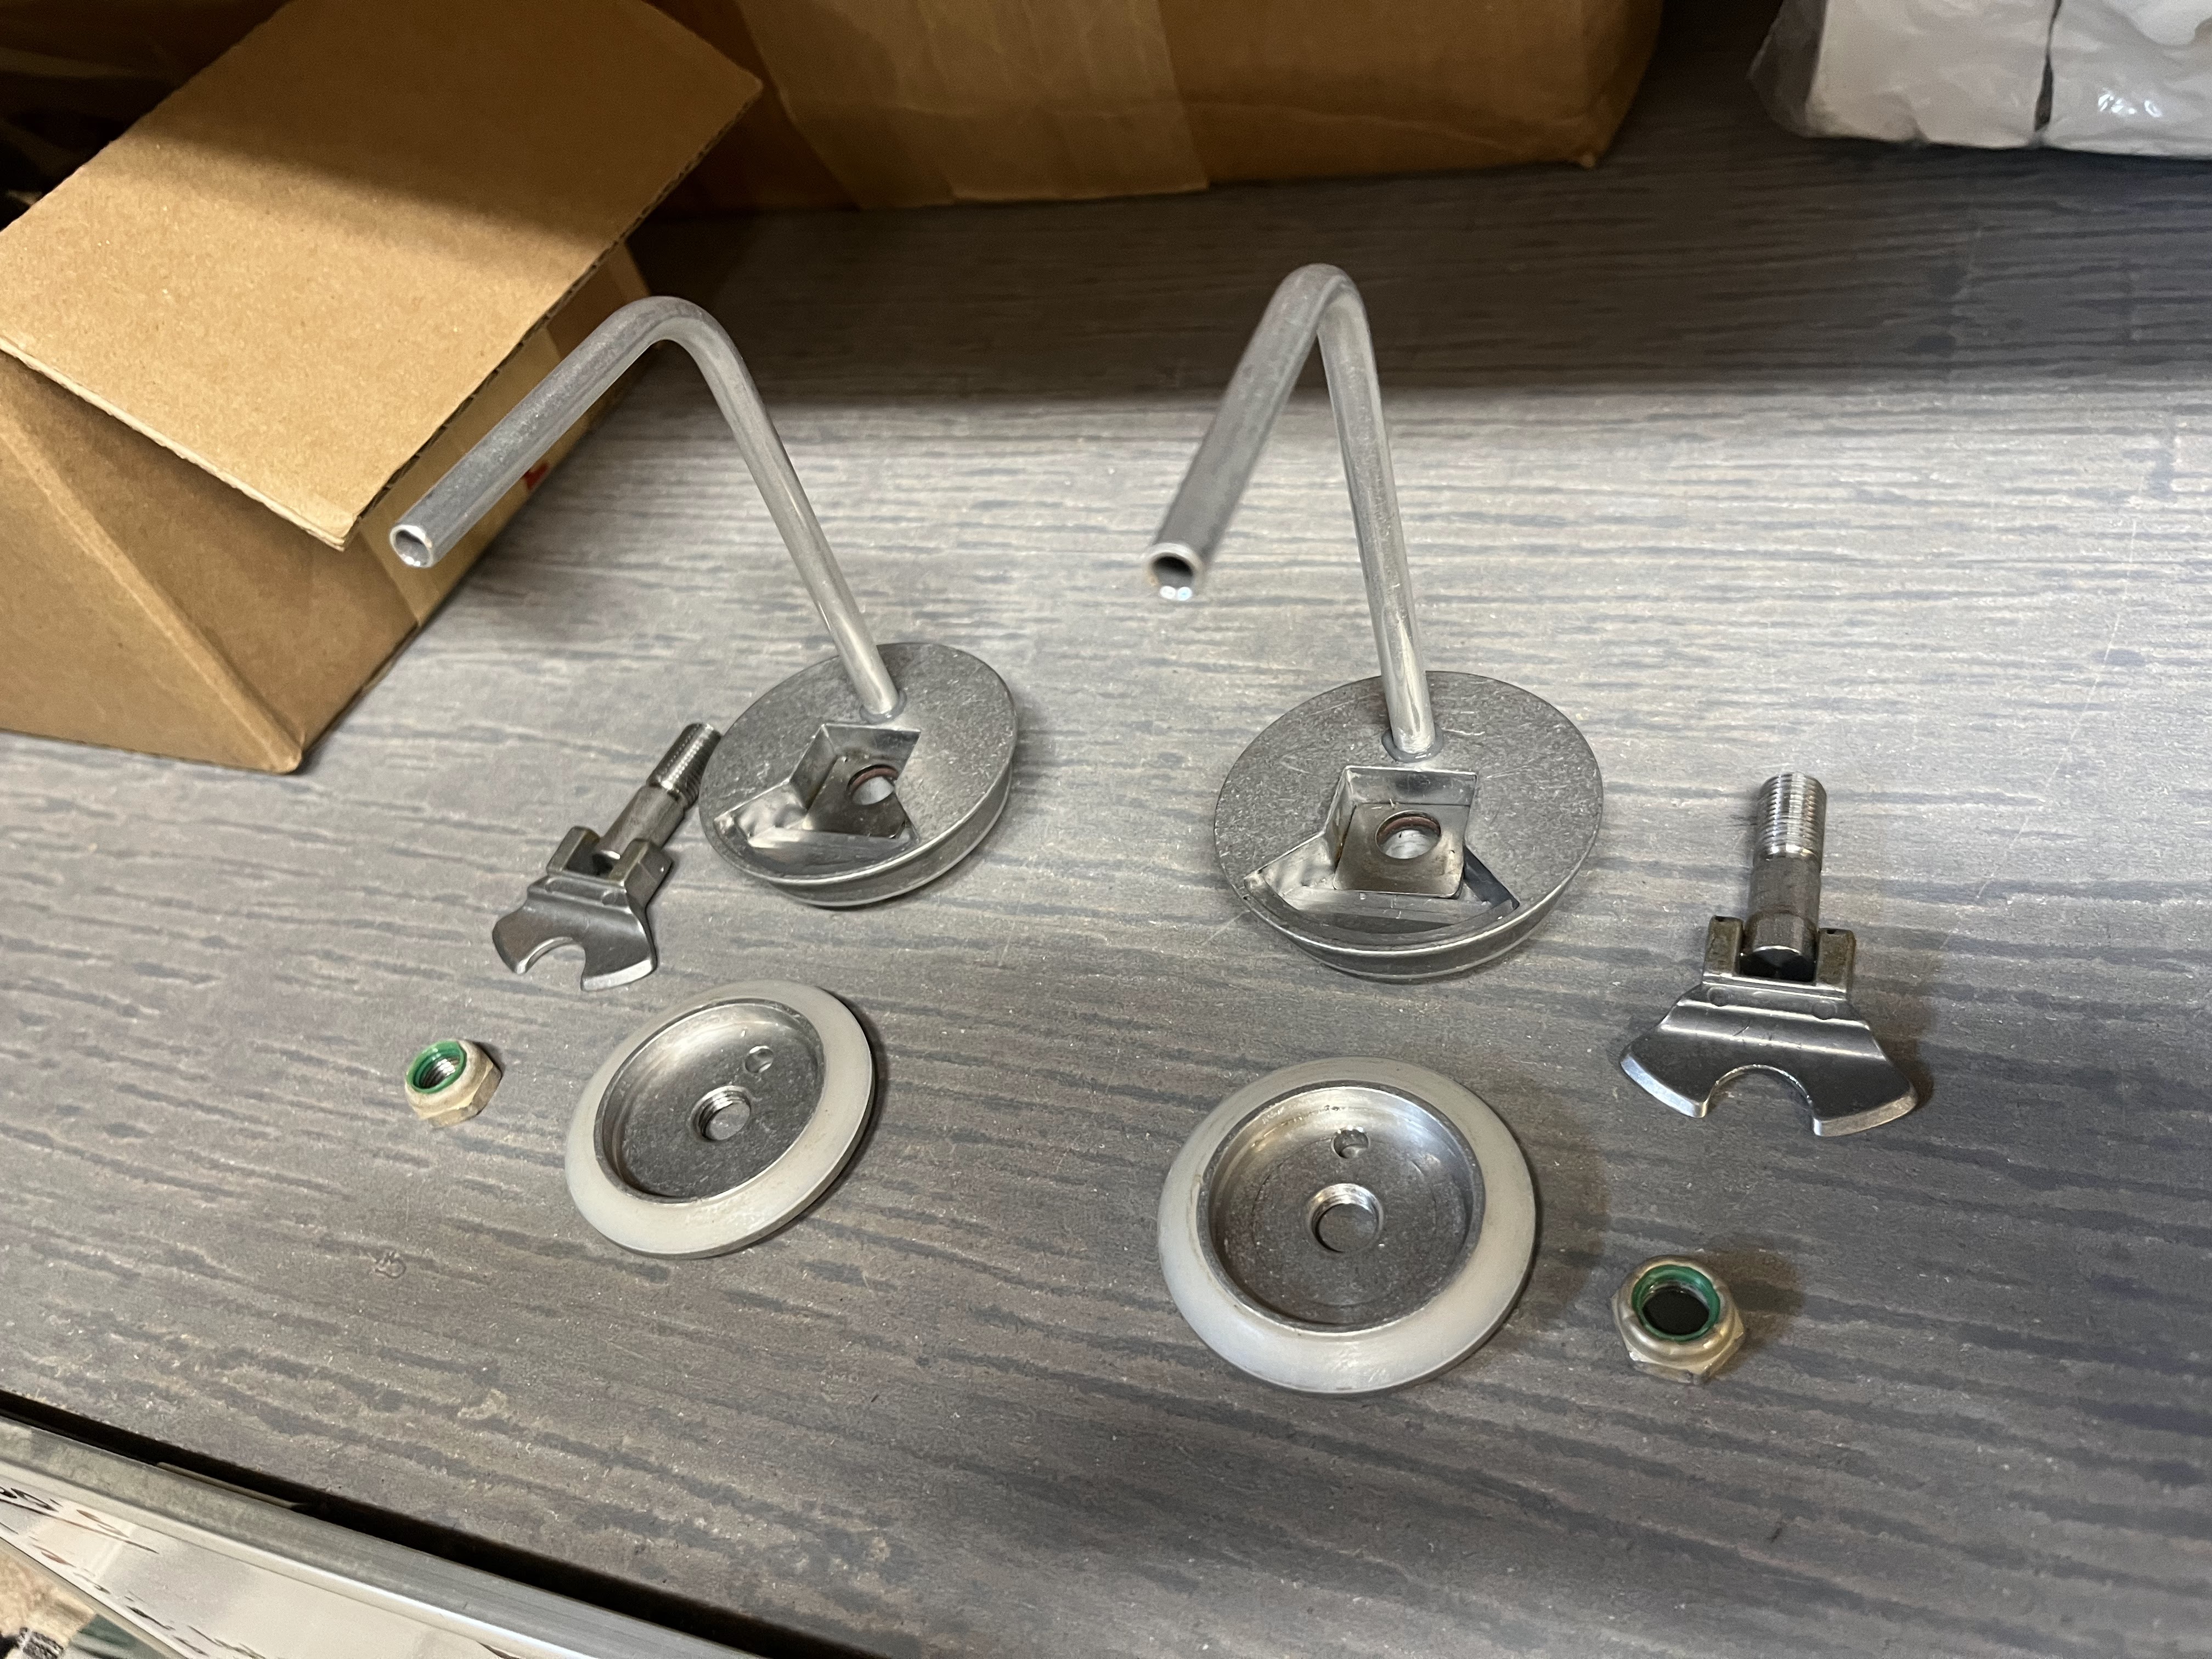
The fuel caps need to be vented, so we disassembled the fuel cap and drilled a 3/16" hole in the top and bottom sections of each fuel cap.  We then upsized the hole to 1/4" in the upper fuel cap, but only to half the depth.  The fuel vent tubes were cleaned and epoxied into the 1/4 inch holes.

Hole drilled in top of fuel cap

Vent tubes epoxied into the fuel caps

We decided to spray black Plasti-dip on the seat position latch handles.  After masking off most of the base, the T-handles were sprayed with about 6 coats.  Hours: 13

Plasti-dip on seat position latch handles

Sunday, April 23, 2023

Orange Paint, Horiz Stabilizer, Boot Cowl, Windscreen, Gear Leg covers

We painted some more parts Ocala orange in our paint booth, including two side fuselage foot-well panels, 1 inspection cover, and 2 aluminum gear leg covers.

Orange paint sprayed on 5 parts

The horizontal stabilizers were inserted into horizontal tubes in the tail and bolted in place.  The flying wires for the horiz. stabilizers were also installed and all bolts torqued as required.

Installing a horiz. stabilizer

Flying wires attached

The boot cowl was installed, and the windshield was set in place.  Next screws were installed along the front through the boot cowl and holds the lower edge of the windshield in place.

Boot cowl installed; Line of screws along bottom of windscreen

We attached the (orange) gear leg covers on the bottom of the fuselage.   

Attaching gear leg covers

Right gear leg cover. Finish is nice and shiny.

The front and rear windshield brackets were installed with stainless rivets. 
Rear windshield bracket installed (with "Experimental" lettering)

Finally, we temporarily attached the footwell panels so that we could see how the overall paint scheme looks and make sure everything lines up right. Here is a nice shot of the airplane with the cowling and panels in place.  We still have some blue protective tape on some parts, and are likely adding a stripe at the border between the orange and white.  Very happy with how it's looking so far.  Hours: 21

Nice side shot of airplane with painted parts in place

Sunday, April 16, 2023

Painting updates

We continued with the priming and painting of misc parts.  Several access plates were primed and are now ready for paint

Access plates primed

Orange paint was applied to the lower cowl.  Once dry, we sanded it lightly and then shot another coat.  The finish came out shiny and smooth, so we're happy with how this came out. 

Lower cowl painted orange

We took all the pieces of cowling to the airport where we have the fuselage stored and attached them temporarily.  We did this so that we could determine exactly where to position the orange/white border on the footwell side panels. In the picture below, those side panels are aluminum panels that cover the remaining visible openings in the fuselage.  


Lastly, we applied the "experimental" lettering to the back of the headrack (rear windshield bracket).  This will be very visible behind above and behind the seats as soon as you open the door, and meets the requirements of the FAA (minimum 2 inch lettering).  Hours: 19

"Experimental" lettering applied to rear bracket

Sunday, April 9, 2023

Misc Parts Painting

The painting continues.  The main struts were previously painted, but we found the coat was light in a few places with gray showing through along the leading edge of the struts, so another coat was applied to both struts. 

Another coat of white on the main struts

The flap-gap seals are long aluminum strips that cover the gap between the wing and the flaps.  These were painted vestal white to match the wings.  There were some imperfections after painting, so these were then sanded with 2000 and 3000 grit, and buffed.

Setup for painting the flap-gap seals

A couple of front windshield angle brackets were painted, along with the pitot tube fairing.
Pitot tube fairing and windshield brackets painted white

We also hung and painted the oil door and a couple of inspection cover plates.  We plan on lightly sanding and buffing the oil door so it will be smooth and shiny to match the cowling.  Hours: 18
Oil door and cover plates painted

Monday, April 3, 2023

More priming and painting

 We continued the priming and painting of several different parts.  The lower cowl will have a little bit of white at the top, so this was masked and painted (most of it will be painted orange later).  

Vestal white paint on top bit of lower cowl

Several other door and windshield brackets and trim pieces were primed and painted:

Center door trim, windshield cap strip, and
rear windshield bracket primed

Door side brackets and front windshield bracket primed

Flight sticks and seat position pins primed 

The door frames were painted black.  Once dry, the doors were assembled and riveted. The Lexan windows and center trim pieces were attached with aluminum rivets that had black heads to match the paint.

The door frames were painted black

The front and rear trim pieces were painted vestal white.  The windshield front angle brackets were also (attempted to be) painted vestal white, but we had an issue with wrinkling in the paint along the edges.  I believe this was due to too heavy an initial coat of paint.  This was sanded down and the parts will be repainted. Hours: 24

Windshield front angle brackets painted