Tuesday, June 28, 2022

Coolant Extension, Oil Lines and 3D Printing

Now that we have "most" of the windscreen and skylight work out of the way, we moved back to more firewall forward work.  We've been fighting with the water pump elbow on the Rotax 912iS engine.  No matter where it is placed, the engine Ring Mount interfered.  Luckily Edge Performance in Norway has come up with a solution that works well.  They provide an extension section that moves the elbow out away from the engine allowing you to route your coolant hose around the Ring Mount. 

Extension as delivered, Included o-ring and new bolts

Extension installed

We also decided to make new oil and fuel hoses.  We had originally planned to use some high-performance light weight racing hose, but after many attempts doing pressure testing on the hose assemblies, we could never eliminate a very slow leak.  We switched gears and are using a more standard hose.  Luckily, since the previous hoses were already made we just had to duplicate the lengths for the new hose assemblies. Took us a whole day to make the new hoses, but much more pleased with the outcome!

To try and clean up the firewall forward, Mike designed some hose organizers and 3D printed them.  They came out well and help organize and route the hose lines over the engine.

3D Printed Hose Organizers

We also wheeled the airplane outside for a few "glamour" shots in the sunshine.  We've made a lot of progress since the last time it was outside.

Hours: 15

Proud Builders

Straight on View

Cockpit/Panel View

Side View


Wednesday, June 22, 2022

Windshield and Sunroof

Made good progress on the windshield installation.  Holes were drilled (and deburred) in the boot cowl, the windshield brackets (top and sides), the cap strip, and the acrylic windshield itself.  Special drill bits were used to drill the plastic to prevent damage to the windshield. The windshield edges were also trimmed and sanded smooth, and temporarily attached with clecos.   We're very happy with the fit. 

Ed drilling lower holes in the windshield

Michael sanding edges of windscreen

The sunroof is a separate piece of plastic which is more flexible than the windshield.  The sunroof shape was roughly cut out of a 4x8 sheet of Lexan, then clamped in place on top of the fuselage with 1/8" spacing from the windshield along the front.  Holes were drilled for screws along the front (match drilled to existing holes in the windshield bracket).  Then holes marked and drilled along the sides and back for rivets.  

Made a stupid mistake by drilling a hole in the wrong place when our hole-duplicator tool was accidentally aligned with an existing rivet instead of a hole in the bracket.  This resulted in an unwanted hole along the back edge of the sunroof.  We thought about the best way to recover, and decided to just make a new sunroof because we had extra Lexan material.  The second one came out perfect.  Clecos were installed to hold it all in place after the holes were drilled and deburred.  We marked the edges and began trimming the excess material around the perimeter of the sunroof, but still have a little work to do to get all the edges trimmed nicely.  Hours: 20

Sunroof installation in progress

Front bracket with holes drilled for sunroof and windshield

Friday, June 17, 2022

Windshield

We started working on the windshield this week.  We are installing a "Steve Dentz" windshield that is pre-formed instead of the standard windshield that is bent into shape from a flat sheet.  

The top windshield bracket is made up of 2 aluminum pieces riveted together, with a cap strip that will be attached across the top.  The angle of the 2 pieces didn't quite line up with our roofline, so we bent them slightly with a 36" brake to get them to line up. The two pieces were trimmed and riveted together.  The bracket was clamped to a long straight edge to ensure it lined up with the top of the root rib, and holes were drilled through the fuselage tabs into the bracket so it could be cleco'd in place. 

Windshield bracket clamped in place

Holes were drilled approximately every 4 inches along the top and back edge of the cap strip, and match drilled holes in the windshield bracket (these are the locations where the windshield and sunroof will be screwed into place), and then additional holes were drilled for the rivets for attaching 6-32 anchor nuts.  The anchor nuts were then riveted in place to the windshield bracket.

Drilling for an anchor nut

The windshield bracket was cleco'd in place, and the windshield was set in place.  The three pieces of the cowling were also attached to check the fit of the windshield.  The windshield was trimmed slightly to ensure there was no interference.  Locations for screws along the boot cowl were marked every 2 inches, and then 1/8 inch pilot holes were drilled in the boot cowl.  Still have a ways to go to get the windshield installed, but making good progress.  Hours: 12

Windshield fitted and pilot holes drilled in boot cowl

Monday, June 13, 2022

NACA air duct work

Made some fancy holes in the two aluminum side panels to match the profile of our small plastic NACA air ducts.

Hole cut for NACA duct

The two NACA ducts themselves were primed and painted white.

Ducts painted white

Had issues with the paint on one of the side panels.  After cutting the hole, the paint lifted and had a nice tear.  Looks like the primer didn't hold well in this area, so I had some fix work to do.  

Paint peeled up

The area was sanded and re-primed it with a different brand of metal primer (Polyfiber).  Tried to touch up the white paint with an airbrush, but it didn't come out very smooth, so I'll just sand and repaint it later when we paint some of the other unfinished parts, such as the cowl or turtledeck.   Hours: 15

Wednesday, June 8, 2022

Panel, Fusebox and ECU installed

 The Rotax Fusebox was placed on the engine side of the firewall per Rotax recommendations.  We spent some time looking for a good mounting locations and the location in the attached picture is the best we could come up with.  Not super convenient, but acceptable.

Rotax Fusebox Mounting Location

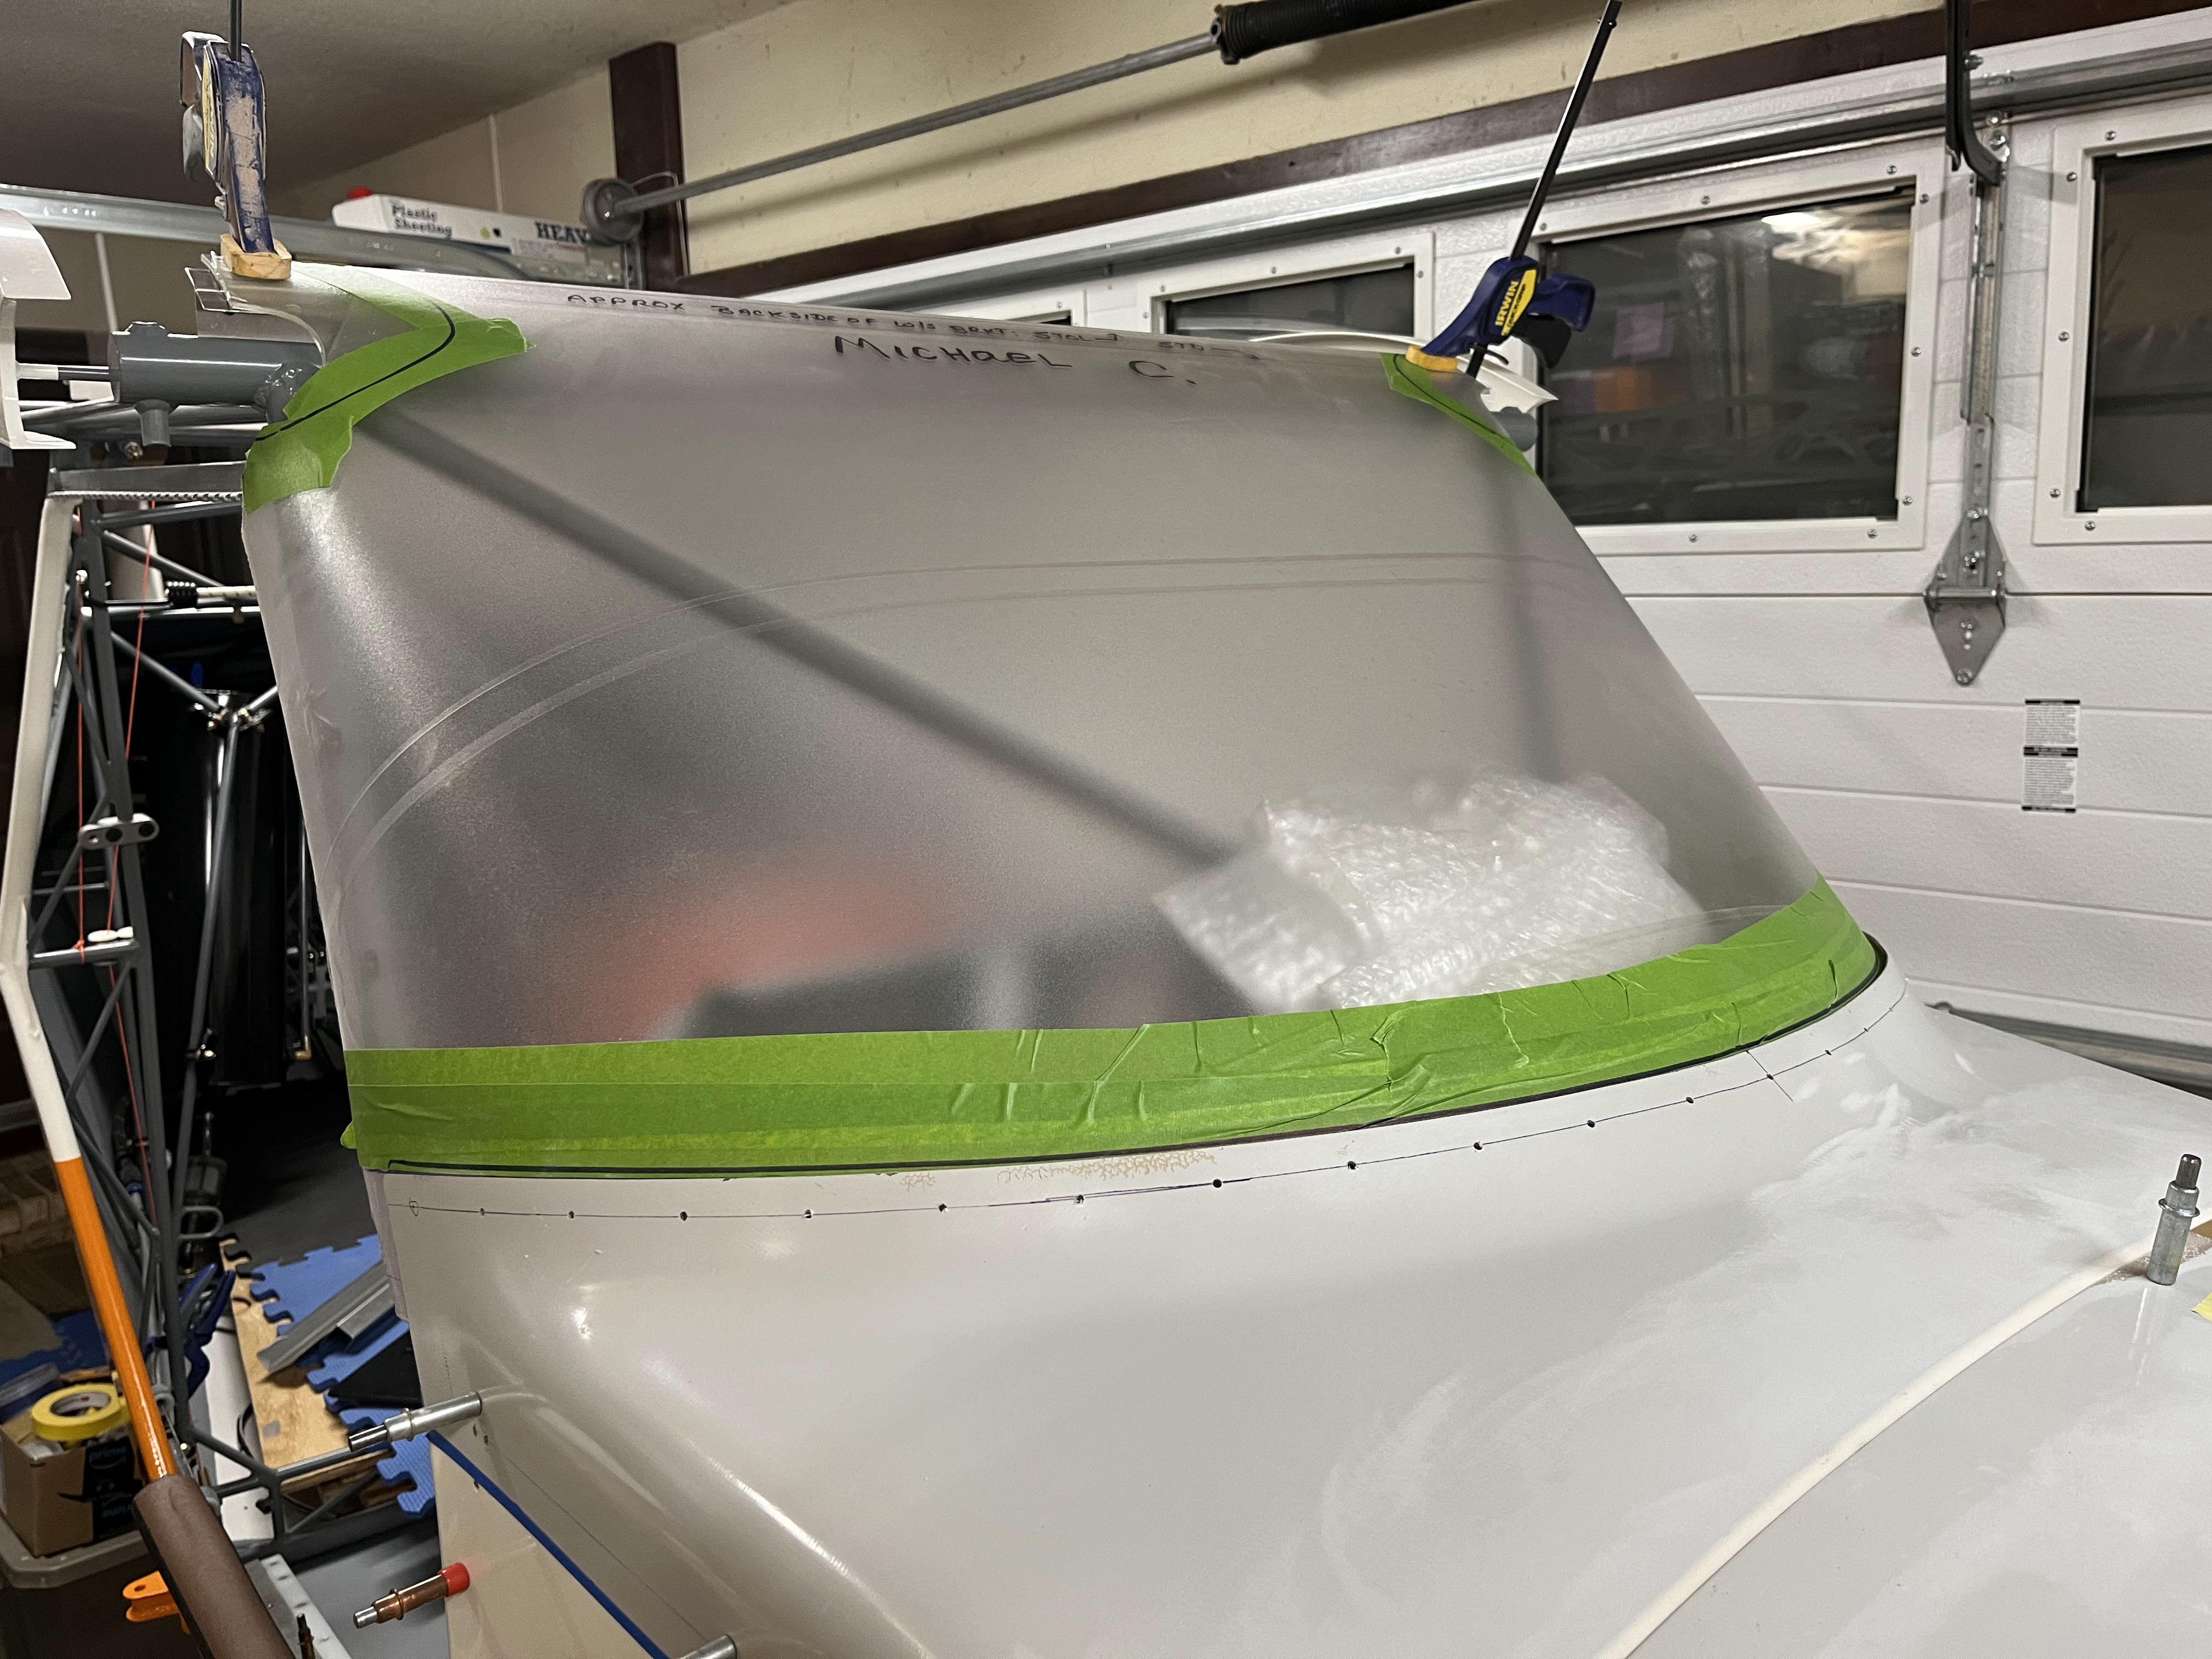
A lot of work has been put into getting the panel installed into the airplane cockpit.  As mentioned earlier, we had a local builder cut out our panel on a Shopbot CNC machine.  A little cleanup was needed on the panel.  We also had to cut one hole by hand for the Rotax Debug port as we forgot to add that in the computer software.  Once the panel as cleaned up, we used  our large brake to bend the four flanges that help stiffen the panel and provide some safety shielding at the bottom.  Since we have a lower end brake, we had to use some sacrificial material to make sure we got the bend radius we needed for the 0.040" aluminum we used on the panel.

After the panel was bent, a gray carbon fiber vinyl wrap was applied to the panel.  The vinyl was removed from the holes in the panel using a sharp razor blade and a good X-acto  knife.

On the lower portion of the panel, there are three points that attach the panel to the fuselage.  Two screws hold the panel on the outer portions and the throttle control secures the panel in the center.  The top of the panel needed to have some supports .  Two supports were fashioned out of extruded aluminum angle. The one on the right side needed to have some features added to clear the Garmin G3X.  Mike got he shape and bends in the aluminum set and Ed followed up by welding the complex bend to make the part stronger.  As can be seen in the attached picture, the panel supports go from the top of the panel to some fuselage support tubing behind the panel.  The radio also needed some additional support at the back, due to its long moment arm.  A support was fashion to connect it to a fuselage support tube, again shown in the attached picture.

Michael Installing Panel

Temporary Panel Labels

Panel and Radio Supports added

The Rotax ECU needs to be installed in the cockpit area.  We spent a lot of time trying to find a good location that wouldn't interfere with the side NACA ducts or the cabin heat radiator.  We finally found a location on the left side behind the panel suspended from some fuselage support tubing.

Hours: 15
Rotax ECU Mounting