Sunday, March 17, 2024

Baggage area improvements

We made some modifications to the baggage area to make it more usable.  We cut some 2" thick (pink) foam to build up the baggage area on both sides of the center push-pull tube cover.  This was done to make the baggage floor flat without a big bump in the middle.  We sprayed the pink foam with gray paint, and also covered the top with gray fabric that was left-over from our interior finishing kit.  Contact cement was used to glue the fabric to the top of the foam.

2" foam covered with fabric

Baggage floor before foam added

Baggage floor after foam added

Next, we added a small cargo net to the rear baggage floor, anchored to 4 tie down.  We also fabricated a second net for the cargo area directly behind the seats.  This allows us to quickly drop a flight bag behind the seats without worrying that it will move around.  We fabricated this ourselves from from some polyester black mesh fabric we got off of Amazon.  It was cut to size, and double-fold bias tape was sewn along all sides.  Paracord was run through the front and back edges to allow for attachment, and the ends were simply tied to a few of the fuselage tubes.

Rear baggage compartment with cargo net

Front cargo bay with netting material

Saturday, September 2, 2023

First Flight!

 After bringing the airplane kit home with us in May 2014, it been a very exciting 9+ years of building.

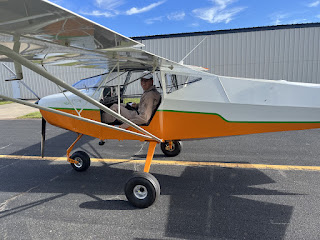
At approximately 7:54AM, September 1st, our airplane project graduated from a land based "project" to a fully functional flying airplane.  Ed was at the controls of the first flight.  We elected to try a task based flight program to satisfy our Phase 1 flight testing.  We are using the EAA Flight Test Manual and Test Cards to fully wring out out plane.  Ed flew for close to an hour before returning to earth.  We performed a full aircraft inspection and found no anomalies.  The next day, Michael flew for close to an hour as well.  We were testing basic functions including the flap functionality.  No stalls yet, but we did approach stalls at all the various flap positions.

First Flight with Ed at the Controls

Ed with a Highlander Grin

Second Flight with Michael at the Controls

Michael with his Highlander Grin

Wednesday, August 30, 2023

Airworthiness Cert, Vortex Generators, Rigging Check, High speed taxi test

We finally received our airworthiness certificate on Aug 20, but had some work to do before first flight.  During our trip to Brasstown for transition training, our flight instructor (Vic) at Plane Fun Aircraft gave us many tips, and strongly recommended that we add vortex generators (VGs) before first flight.  These should lower stall speed a bit and they reportedly do not affect top speed.  We originally planned on adding them post flight to gauge their effectiveness, but changed our minds after talking to him.

The VGs that came with our kit had sharp corners and no adhesive (they recommended a form of super glue).  We elected to order some new ones (Stolspeed VGs) as these had a more rounded shape and came with 3M adhesive that is removable.  We installed them per instructions.  The VGs at the wing tips are installed with a closer spacing to ensure the wing tips stall after the root wing stalls.  We also installed VGs on the bottom of the horizontal stabilizers.

VGs on the wing

VGs on horizontal stabilizer

Also, even though our wings were rigged at the factory, we were advised to double check this   According to Vic, If the wing is leveled at the root, and measures something like -1 or -1.5 degree angle at the center (angle of incidence), then it should be about -2 to -3 degrees at the wing tip.  Having a little twist like helps ensure that the wing tips will stall after the main wing stalls. More important is to ensure that both wings are identical.  When we measured our wings, we found that the right wing was close to level across the whole span (no twist).  The left wing was a little better but had just -0.8 degrees at the tip.  We adjusted the right wing as far as allowed by loosening the jury strut and then rotating the main strut's clevis fork rod end, and were able to get it to -1.2 degrees at the tip (with about 0.6 degrees center).  The left wing was then adjusted to match this. 

We also ran another taxi test.  This time it was a higher speed taxi test down the runway.  Power was applied gradually while holding back the stick until the nose lifted off the ground, then reduced to hold the position.   The test went well, although we noted that the airspeed on our Garmin G3x never dropped under 23 MPH.  We contacted Garmin and found that this means we need to have our GSU25c (ADAHRS) replaced.  Luckily, this will be covered under warranty.  

We are also finding that our coolant temps still run a little high during taxi on hot days so we may need to adjust the cowling opening and/or radiator position sometime in the future to improve this.

Friday, August 18, 2023

Transition Training

 While waiting for our airworthiness inspection, we decided to get some transition training in a tri-gear Highlander.  We did this for 2 reasons... The primary reason was to get familiar with the airplane and stay safe, and the other was to appease the insurance gods that require some transition training before providing coverage.

We drove to Brasstown, NC to a build center for Just Highlanders called Plane Fun Aircraft.  Vic Payne was our flight instructor, who was outstanding.    The mornings were foggy, but it generally burned off somewhere between 10 or 11 am at which point we had beautiful flying weather.  We took turns flying and over the span of a couple days, we each received 5 hours of flight training.  Vic was not just a great flight instructor, but also a wealth of knowledge who gave us some excellent tips on rigging as well as suggestions on future potential plane modifications that might help with W&B, controls, or maintenance.  He also gave us some great tips on how to prepare for and fly initial test flights as he has done this on many many Highlanders.

Michael prepping for flight with Vic Payne

Ed starting his flight instruction with Vic

Monday, August 7, 2023

Airworthiness Inspection

We contacted our DAR, Lisa Burwell, early in the week to finish the airworthiness application and schedule the inspection.  A few days later, she called and said she had an opening on Fri, Aug 4, which we immediately agreed on.  The day before, we removed the cowling, turtledeck, footwell panels, and many inspection panels so that everything could be seen during the inspection.  

   She arrived with her husband, who is also an experienced A&P, and they both gave the plane a very thorough inspection.  Lisa also went over all the paperwork to ensure everything was in order.  They gave us a lot of great information and suggestions, and they did find a couple of nuts that were missing cotter pins, which was an easy fix.   Very happy with how the whole process worked and I can definitely recommend Lisa as a DAR.  We passed the inspection, and now have to wait for the FAA to process everything in order to get our airworthiness certification. 

Wednesday, August 2, 2023

Taxi test; coolant temp check, fuel system

Another taxi test was performed, this time watching the coolant temps closely since they were a bit high last time when running with the top cowl off.   This time, we kept the top cowl on to keep airflow as it would be during normal taxi, and the results were very good.  Coolant temps remained within the green. Outside temps were about 10 degrees cooler (87) than the last test, but coolant temps varied between 204 and 217 during taxi test which was over 35 degrees cooler than the last test. 

Michael checking coolant temps during taxi

Also, we double checked the fittings that were tightened last time (at bottom of left fuel tank, and at bottom of header tank).  No fuel seepage was detected so looks like these are now fixed.  

Lastly, we attached a small zippered plastic pouch to the left footwell panel which will hold our airplane registration and other documents that need to remain in the airplane.  Hours: 3

Monday, July 31, 2023

Engine idle adjustment, Fuel system

We adjusted the idle on our engine, as it was idling too low (below 1400 RPM).  By turning the idle screw a bit at a time and retesting, we found that a total of 5 whole turns clockwise was needed to get it to 1700 RPM where it was idling smoothly. 

We started to do another taxi test, but cut it short because our coolant temperatures were getting too high.  We had the top cowl off during this test, so suspect the change in airflow may have contributed to this, along with the very hot outside temperatures (97 degrees).  We will retest this with the top cowl on in near future to check this out. 

We installed a new bingo fuel sensor that arrived in the mail (since the initial one died on us).  The new sensor works great and our low fuel warning light is working again.

We have been smelling some fuel odors in the cabin, but an initial search for leaks didn't turn up anything which was a bit confounding.  However, the odor didn't go away over time, so we decided it was time to go on a more thorough hunt for the source.  By examining every fitting very carefully and closely, we actually found 2 issues.  One was an NPT fitting at the bottom of the header tank.  We could feel one area was slightly moist where a little fuel has slowly seeped out.  This was tightened to seal the leak.  The other issue was at the bottom of the left wing tank, where the fuel strainer screws in.  We had to unfold the wings to find this one.  The fitting was actually bottomed out in the hole, so it could not be screwed on any tighter.  We found a 2nd fuel strainer that had threads cut a little different to fit a bit tighter.  We installed this fitting and reconnected the hoses to the wing.    Hours: 6

Slow leak at bottom of header tank

Slow leak at bottom of left wing tank


Thursday, July 27, 2023

Another taxi test

 Today was a hot day (high of 96), so thought it would be interesting to watch our temps while taxiing, especially since there is much less cooling airflow through the radiator and oil cooler during taxi.  Happily, all our temperatures remained in the green during the test today as the plane was taxied around the airport.  We forgot to insert an SD card into the Garmin G3 unit, so we couldn't easily review all the data later, but we did note that all temps were well within the green.

Below is a short video showing a bit of the taxi test.  Kept the pilot's door open during this test due to the outside temps.  Hours: 1

Wednesday, July 26, 2023

Fuel tests, flaps, misc prep

 We've been taking care of various miscellaneous things to get ready for inspection.  We performed several fuel tests to determine the unsuable fuel as well as total fuel for our airplane.  Each of the fiberglass wing tanks hold 12.5 gallons, the header tank holds 2.3 gallons.  The unusable fuel in the header is just 8 oz, and the unusable fuel in each of the wing tanks is about 1/2 gallon.   

During the tests, we found that our low fuel detection system was not working.  After some debug, we determined that the sensor itself was bad, so ordered a new one and replaced it. The new sensor is working and our bingo fuel detection is once again up and running.

Bad fuel sensor that was replaced

Fuel flow tests were performed with the airplane in level attitude (which is the critical attitude for this plane), and also tail low (corresponds to nose 15 degrees high).   Tests with individual fuel pumps running, and both running were performed.  Even with minimum fuel, fuel flow through the system was always above 24 GPH  which was very good since our minimum requirement is 9.25 GPH (125% of max fuel consumption).

Fuel was added a bit at a time so we could determine markings of fuel level.  Fuel levels are visible through the fiberglass tanks, so adding markings will give us an approximate fuel level.  A label with markings will be made that will be glued to the tank.

Detailed Fuel flow data is shown below:

We found that our flaps were rubbing a little bit on the flap gap seal in some areas, so carefully bent the edge of the flap gap seals to prevent this from happening.
Wear mark on flap shows where flap gap seal was rubbing

We also adjusted the routing of a wires in the engine bay to avoid potential rubbing, and wire-tied the heater hose valve in place.  Hours: 15

Monday, July 24, 2023

Wednesday, July 19, 2023

Rear baggage wall, W&B, Taxi test

Fabrication of the panels for the rear baggage wall was completed and they were then installed with self-tapping screws.  A power connector located in the center allows for easy connection to a battery charger/tender for our aft mounted battery.  Holes were precisely located for the rudder cables and elevator push/pull tube.  A large notch was cut out on one side (and then covered with plastic) to allow for a good RF (blue-tooth) connection to the transponder which sits directly behind the panel.

Rear baggage wall

A protective cover for the elevator push-pull tube (with lightening holes) was screwed down to the baggage floor.

Elevator push-pull tube cover

We changed out a fuel hose running from the header tank to the Curtis fuel-test valve.  We noticed that the old hose (Versilon SE200 tube) had two small kinks where there were slight bends, so we decided to just replace it with a more robust hose.  The hose we used was a Parker 397 Superflex hose purchased from Aircraft Spruce.

We ran some fuel tests to determine unused fuel levels in the tanks when level.  The two wing tanks which hold 13 gallons each, have about 1/2 gallon of unused fuel each.  The header tank which holds 2.3 gallons has just 8 oz of unused fuel.   

With all parts on the plane (including all inspection covers), we performed a weight and balance check.  The empty weight for our airplane is 824 lbs, and the center-of-gravity came out to be 10.9" aft of the datum (which is the leading edge of the wing).  This works out nicely and is well within the limits of 9-15.5".  We will perform later calculations for most-aft loading and most forward loading, but everything is looking good at this point regarding our weight and balance.

We rolled the plane out of the hangar and did a magetometer intereference calibration.  

Plane pulled out of hangar for a few tests

Then we decided it was finally time to fire it up and taxi it around for the first time.  The airplane fired right up, and we took turns taxiing it around the back of the hangars for several minutes.  This went well and gave both of us a chance to get a feeling for how the steering works with the differential toe brakes.  The steering worked great and we had no problems with taxiing.  Hours: 15

Initial taxi test at KTTA

Friday, July 14, 2023

Glareshield, Fire extinguisher

The glareshield was installed using black screws along the front.  Two small Garmin GPS antennas are mounted on the glareshield, with cables routed down the center hole to the back of the instrument panel.

View of glareshield from outside

Glareshield installed

A small Halon fire extinguisher was installed next to the flap pulleys behind the seats.  Before picking this location, we checked to ensure that it was easy to access, even when the pilot is buckled firmly into the seat.  Hours: 7

Fire extinguisher installed

Wednesday, July 12, 2023

Door latches, Floor pans, Dataplate, Antennas, Fuel labeling, PTT wiring

 The latch for the pilot side door was re-drilled (correctly this time around), painted black, and installed.

Both the front and rear floor pans in the baggage area were installed with sheet metal tapping screws that came in the kit.  Nut plates were installed in the front floor pan for an inspection cover.  This cover is right above the transponder/ADSB antenna and will allow for much easier inspection than removing the entire floor. After installing the floor pans, the flap pulleys were reinstalled and torqued down.

Baggage floor pans installed

Inspection cover plate

The aircraft dataplate was riveted on with a stainless steel backer plate.  This is located under the tail on the pilot side.


The Garmin GPS antenna was torqued down.  Also applied a very thin bead of silicone caulk on the bottom side prior to torqueing the screws to keep it weatherproof.  There is a thin metal plate under the fabric that serves as a ground plane.  The transponder/ADSB antenna on the bottom side was also torqued down after first making and installing a foam gasket to seal up any gaps between it and the fuselage.

Final install of GPS antenna
Final install of Transponder/ADSB antenna

Adhesive labels for the fuel valves were made and applied to the triangular fuel cutoff plate.
Descriptive labels applied

Did some cleanup of PTT wire routing to the left flight control stick.  Will need to do the same for the right stick.  Hours: 15.5

Sunday, July 9, 2023

Window, fairings, latch, antenna, etc

The left triangle-shaped window was installed.  A very thin gasketing was applied to the inside before screwing on the window to help seal it.
Michael applying gasketing around window opening 

Two fiberglass fairings were installed.  These were previously painted white, and these fairings clean up the area between the windshield and wing root.  A large hole was also drilled in the top of the pieces to accommodate the wing's clevis pin (This pin is removed to fold the wings back).
Curved fiberglass fairing installed

The sensor for our bingo fuel indicator was glued to the header tank in a position that is about 1/3 down from the top.  This is our best guess for position and we may move it up or down later based on later testing.  We don't want it placed too near the top or else we can get false triggers if a wing tank becomes unported during descents and/or turns, but we don't want it too low as we want to have ample time to respond to a low-fuel condition.

We are going to remake the rear baggage walls as the ones previously made don't fit well (holes no longer line up after fabric shrinking), and we want to make the sides a little bit longer.  Some planning was done for this, and we're now waiting for some parts to arrive before fabricating this.

We had an issue when installing the door latch for the left door.  The position of the door latch was 180 degrees off when drilled, and it couldn't be rotated 180 degrees because the drilled hole was slightly off-center.  So to fix this part, the holes in the two parts were filled using a TIG welding machine, and then redrilled with the latch in the correct position.  These parts will be painted black before installation.

Closing off a hole in the latch

Two inspection plates were previously painted, but had tons of dust in the paint coat, so these were polished up to get rid of the blemishes.
Inspection plates polished

We are adding an inspection hole and plate in the bottom floor of our baggage compartment.  This allows for easy inspection of the lower antenna (for ADSB), and the battery vent ports.  We had previously thought that we could just remove the floor to inspect these, but found that it is impossible to do this without also removing some flap pulleys in the fuselage.  So adding this inspection port will make inspections much easier in the future.
Hole cut out in the baggage floor

The com antenna (with its base now painted) was installed in the (newly painted) turtledeck.  Hours: 
Com antenna installed

A few cover plates are in the process of being made.  Each plates will close off part of the opening for each pulley in the wings.  Hours: 25

Tuesday, July 4, 2023

Fuel lines, Painting, Window, Door

Finished up some priming and painting (vestal white) on several parts, including the aluminum turtledeck, two butt-rib fairings, two wing cuff fairings, and the comm. antenna base.  This completes all the painting, minus a few inspection plates that will be done later.


The right side Lexan window was installed (riveted in place).  The left side wasn't installed yet because we were still using the opening for easy access to the fuel lines on that side.


Clear plexiglass window riveted in place

Fuel lines were run from the left wing to the header tank which included a cutoff valve.  This valve will normally be left open, but can be closed when the plane is parked on a slope to prevent fuel from cross-flowing from one wing into the other.  We determined that it is nearly impossible to reach this valve when seated and buckled in as it is directly behind the pilot.  So as a safety feature, we added a control cable for push/pull control of the valve.  This allows the valve to be opened if it is inadvertently left closed prior to takeoff.

Red pull knob installed next to the main fuel cutoff switch

Ed tightening a stop nut for the cross-flow cutoff valve

The pilot side door was installed.  We found a tiny crack in the Lexan near one of the rivets after installing the door.  A tiny hole was drilled in the Lexan at the end of the crack to prevent it from spreading.  Hours: 30

Michael drilling small hole in Lexan